

You’ve taken the photos.
You got the kids ready, packed the snacks, made it out the door, found a beautiful location… and somehow captured moments that actually made your heart pause.
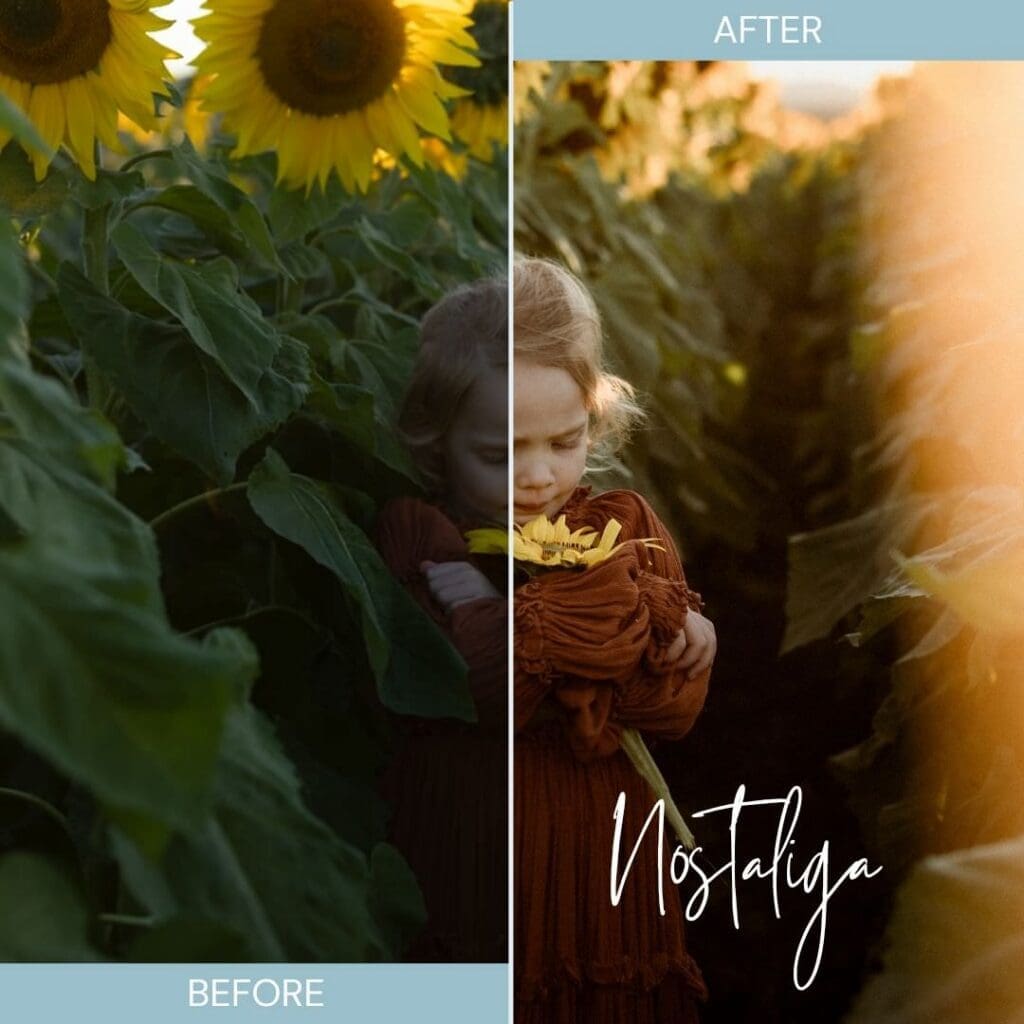
And now you’re sitting down to edit them, excited to bring them to life.
Because editing?
It’s where the magic happens.
It’s where your photos begin to reflect not just what you saw… but how it felt.
But here’s the thing. There are a few common editing mistakes that can quietly take a beautiful image and make it feel a little… off.
And I say this with so much love, because I’ve made every single one of them. So let’s walk through them together.
1. Oversaturating Your Colours
This is probably one of the most common mistakes especially when you’re starting out.
You want your photos to pop.
You want that lush green grass and bright blue skies.
So you reach for the saturation slider…
But suddenly:
- Skin tones look orange
- Greens look neon
- The whole image feels overwhelming
Instead of drawing you in, it almost pushes you away.
What to do instead:
Rather than increasing overall saturation, use the HSL panel (Hue, Saturation, Luminance) to adjust specific colours.
This allows you to:
- Deepen greens without affecting skin tones
- Soften tones instead of overwhelming them
- Create a more natural, balanced image
And remember, most of the time, less is more.
2. Over-Editing (Losing the Natural Feel)
You’ve captured a soft, beautiful moment…
But after editing, something feels off.
This may down to pushing tools too far:
- Too much contrast
- Too much clarity
- Over-smoothing skin
Suddenly, your image looks harsh, overly processed, and disconnected from the moment itself.
A simple fix:
Compare your edit to the original.
Then gently dial things back.
Because often, the most powerful edits are the ones that enhance, not overpower.
3. Inconsistent Editing Across a Gallery
You might have a stunning set of images from the same moment… but when you look at them together, something doesn’t quite flow.
Some are warm, others are cool.
Some are bright, others are dark.
Skin tones shift from image to image.
It breaks the story.
What to do instead:
Edit one image first, your “hero” shot.
Then:
- Sync those edits across your gallery
- Make small tweaks to individual images if needed
This keeps your photos cohesive and tells a much stronger, more intentional story.
4. Starting From Scratch Every Time
If you’re editing every single photo from zero… you’re making it so much harder than it needs to be.
This is where presets come in.
Think of them as your starting point — not your final result.
Presets:
- Save you time
- Help create consistency
- Support you in developing your style
And just to clear this up yes, professional photographers use presets all the time.
You can SHOP THE MAMASTALGIA PRESETS HERE
5. Crooked Horizons
This is one of those things you don’t notice… until someone points it out.
And then you can’t unsee it.
A slightly tilted horizon can make your entire image feel unbalanced — even if everything else is beautiful.
Quick tip:
Use the straighten or rotate tool and align your image with a grid line.
Unless you’re intentionally using a creative angle, keeping things straight will instantly elevate your photos.
6. Chasing Perfection Instead of Story
This one matters most.
It’s so easy to delete a photo because:
- It’s a little blurry
- The hair isn’t perfect
- The composition isn’t “ideal”
But often, those are the photos that hold the most meaning.
A twirl mid-motion.
Hair falling across a face.
A messy, real moment.
These are the images that feel alive.
Instead of asking “Is this perfect?”
Try asking “Does this make me feel something?”
Because that’s what you’ll come back to.
7. Awkward Cropping
This is a small detail that makes a big difference.
Things like:
- Cutting off fingers or toes
- Cropping at awkward points
- Half-visible limbs
It can make your image feel incomplete or accidental.
A better approach:
- Include the full limb
- Or crop intentionally (e.g. mid-thigh, waist, etc.)
Commit to your crop so it feels purposeful.
A Final Thought
Photography isn’t about perfection.
It’s about preserving the feeling of a moment in a way that you can come back to, over and over again.
So instead of looking at your photos and picking them apart…
Look at them with curiosity.
Ask yourself:
What would I do differently next time?
And carry that forward.
Because your style isn’t built overnight.
It’s built in these small, intentional shifts.
And over time, you’ll create images that don’t just look beautiful… they reawaken memories long gone in years to come.
Listen to the Full Episode
🎧 Listen to the full episode on The Art of Childhood podcast
Tune into the full episode on your preferred Podcast host:


Podcast Show Notes:
Episode Links
Get a free Editing Preset/Filter!
Links + Resources
Mamastalgia resources and freebies: https://mamastalgia.co
Join the Mamastalgia Facebook Group: https://www.facebook.com/groups/mamastalgia
Follow Mamastalgia on Instagram: https://www.instagram.com/mamastalgia
Credits
Hosted and co-produced by Courts (Mamastalgia and Blury Photography)
Mixed, edited, and co-produced by Blury Audio: https://www.bluryaudio.com

